The QuickBooks Online menu helps you sync your QuickBooks data with the ICG terminal.
Note:
This tutorial assumes that you’re already connected to the QuickBooks Online portal and you’ve created a company. If not, refer to this tutorial as a starting point.
Table of Contents
What to do
|
Feature
|
Description
|
|
Active Merchant
|
Select the merchant in the drop-down to view the associated merchant transaction
|
|
Language
|
Select the preferred language in the drop-down
|
|
|
Select to view dashboard in full screen
|
|
|
Select to minimize the menu bar
|
|
Search
|
Enter the entity to display the transaction data based on the search
|
|
|
Change the color of the widget
|
|
-
|
Collapse the widget. Click again to expand the widget
|
|
|
View the widget in new page
|
|
Copy
|
Copy the transaction details in clipboard. The steps to copy the transaction are:
|
|
Excel
|
Download the transaction data in excel format
|
|
PDF
|
Download the transaction data in PDF format
|
|
Print
|
Print the transaction data
|
|
|
Select to display the number of transaction per page. The valid values are 5, 10, 15, 25, 50, 100.
|
|
First
|
Go to first page
|
|
Previous
|
Go to previous page
|
|
Next
|
Go to next page
|
|
Last
|
Go to last page
|
Connecting Your QBO Instance
1. Click the QUICKBOOKS ONLINE in the menu items.
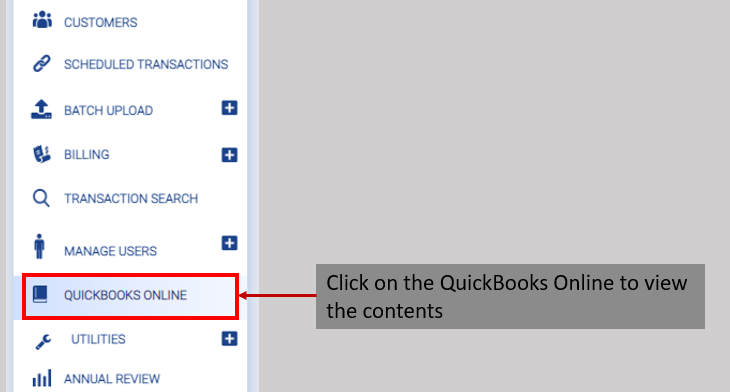
Figure 1: Select the QUICKBOOKS menu.
2. The QuickBooks Online screen is displayed.
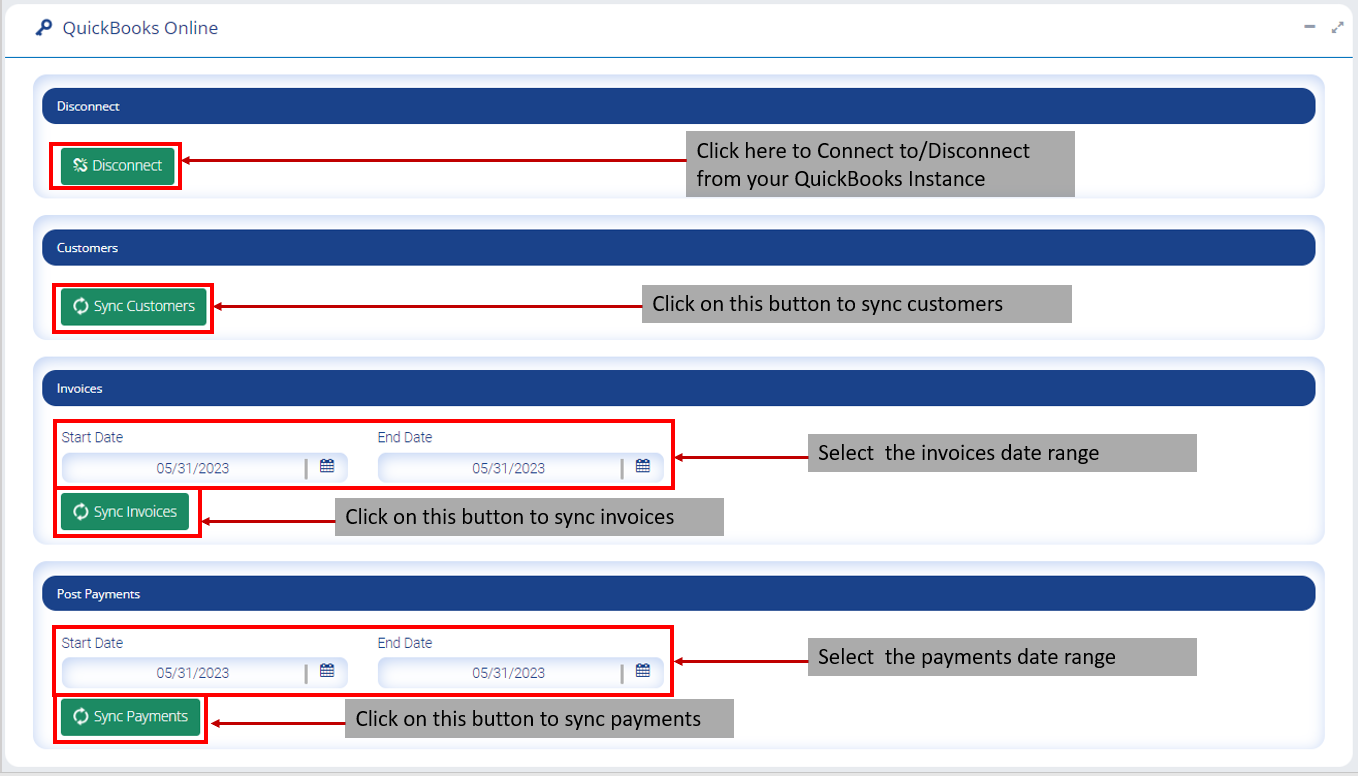
Figure 2: The QuickBooks Online window.
In the QuickBooks Online screen, the features and descriptions are:
| Feature | Description |
| Connect | Click the CONNECT button below the Connect/Disconnect area on the QBO window |
| Customers | Click the Sync Customers button to import customers from your QBO instance to your portal |
| Invoices | Click the Sync Invoices button to import invoices to your portal |
| Post Payments | Click the Sync Payments button to import payments to your portal |
Note:
All the data synced will be visible in the respective points of reference.
Customers
Customers section provides list of customers imported from QuickBooks Online.
1. Select the Customers menu and select the QuickBooks Online in the source drop-down.
2. The imported customers list is displayed
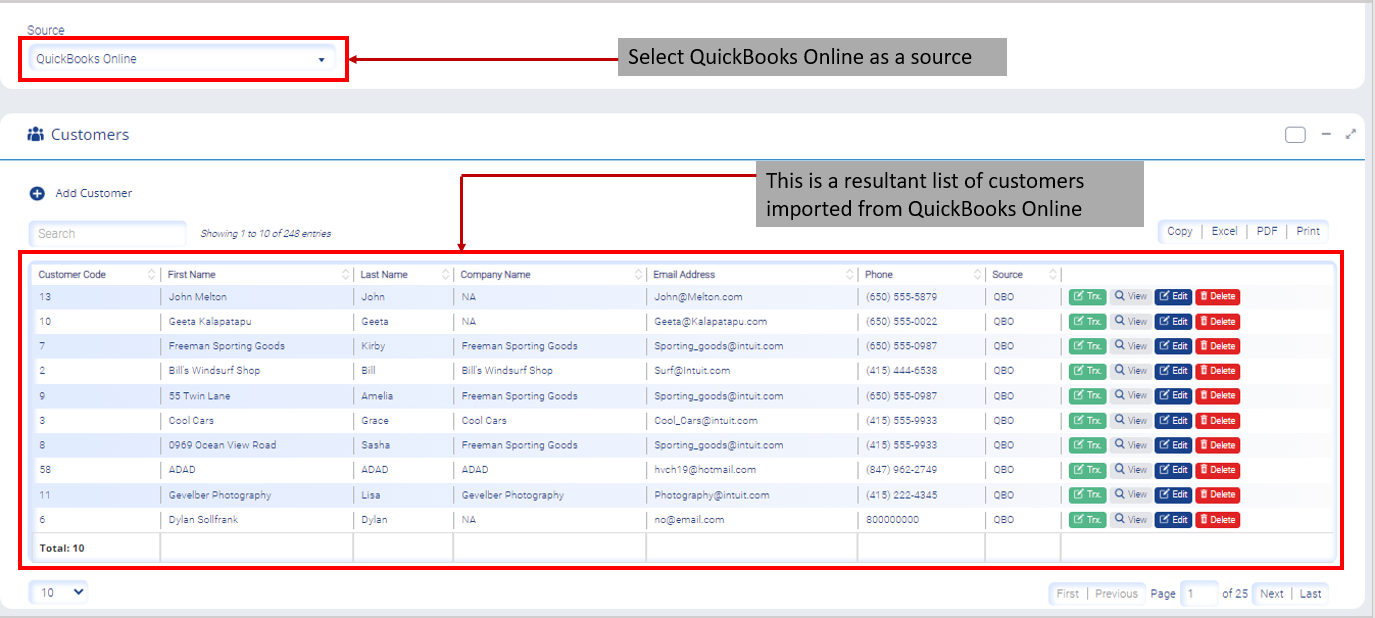
Figure 2: A list of customers imported from QuickBooks Online.
Click here to know the functionalities of Customer section.
Invoices
Invoices section provides list of invoice imported from QuickBooks Online.
1. Select the Invoice menu and select the QuickBooks Online in the source drop-down.
2. The imported invoice list is displayed
Figure 3: A list of invoice imported from QuickBooks Online (figure to be inserted).
Payments
Payments section provides list of payments imported from QuickBooks Online.
1. Select the Payments menu and select the QuickBooks Online in the source drop-down.
2. The imported payments list is displayed
Figure 4: A list of payments imported from QuickBooks Online (figure to be inserted).