API Onboarding Menu
Quick Links
Test the Endpoints using iCG Console
iCG Console provides a seamless way to test and consume the iCG APIs. In this tutorial, you will learn how to get started and test the endpoints of the respective APIs using the iCG console.
Prerequisite
The prerequisite to use the iCG console are:
- You must have the login credentials which is used to access the Developer portal.
- If you do not have login credentials, click here to create an account
Step 1: Generating Your Token
1. Login to the developer portal.
2. Your developer account page is displayed.

3. Click the How to get started button.
You will need to proceed to the Auth page to test validation. Once there, you can access the Login page via this link.
Next, you’ll meet a page with the title API Code Playground. It should look like the one in figure 1 below:
Figure 1: The API Code Playground sample
Please insert the following details into the respective fields:
- username: Enter the username used to login to your developer portal account.
- password: This is your developer portal’s account password.
- grant_type: Defaults to ‘password’. You can leave it that way.
- client_id: This is the Audience Id found in your developer account. Paste in any of the values there (related to the API you want to test). For example, the client_id for the Main API is a30d8974-361c-431b-a5ee-59387bafa8a7
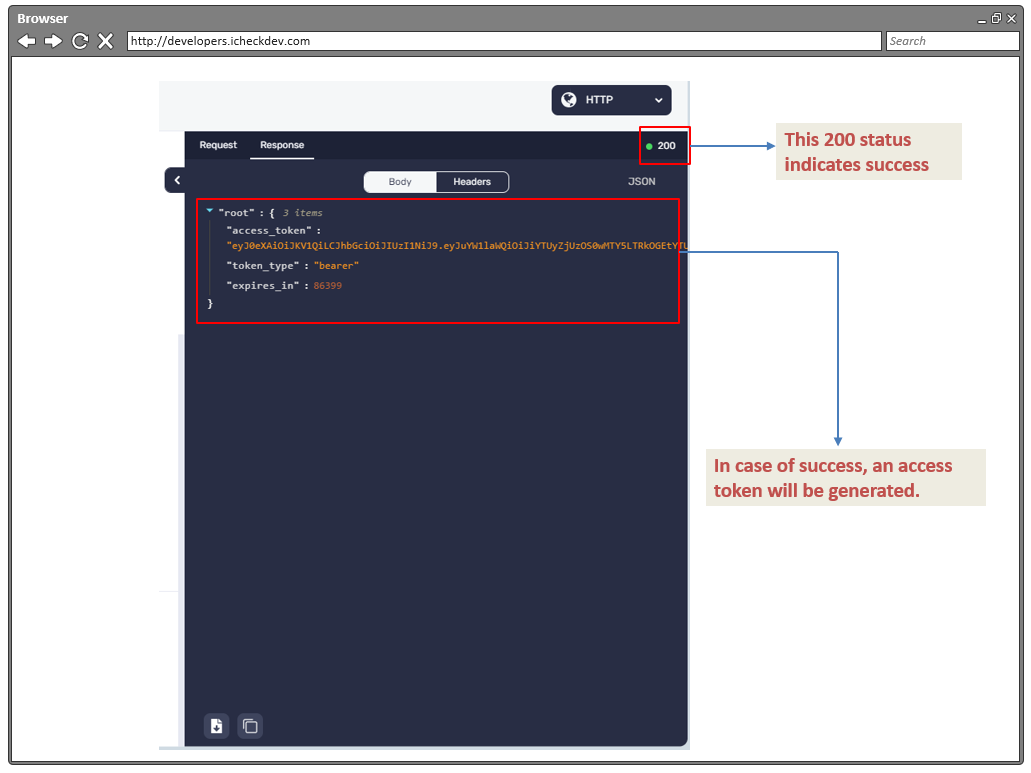
If you enter all these details successfully, a success message (200 code) will be generated that will also return the access token (see figure 2 below).

Figure 2: Access token success message
You will need to copy the access token to use in future authentication instances (when accessing a specific API). You can either select the access token and copy it, or hover over the access_token field and click the clipboard icon to copy it.
Step 2: Testing the Credentials
You will first need to access the specific API you want to test. Please note that it has to be related to the one whose client_id you inserted in step 1 above.
For example, since we entered the client ID for the main API, we will now test values related to the main API.
First, access the API endpoint you want to test. In our case, we'll use the Reports Get endpoint. Click on the link to open it.
With the access token already copied (assuming you did so, if not, please repeat step 1 above), you'll need to add it to the configuration window.
To do so, click on the Request tab (as shown in figure 2 above) then click on the Configure button at the bottom of the screen.
Figure 3: Accessing the Request tab in the console
In the resultant window, scroll down to the Authorization area, and in the text area below it, enter the following: Bearer access-token-value. For example Bearer eyJ0eXAiOiJKV1QiLCJhbGciOiJIUzI1NiJ9. (Refer to figure 4 below).
Figure 4: Entering the access token value
Click on the TRY IT OUT button (bottom right, as shown in figure 4 above) to test out the details entered. If successful, a 200 message will be generated.